Email Authentication
Email auth is a powerful feature to couple with sub-organizations for your users. This approach empowers your users to authenticate their Turnkey in a simple way (via email!), while minimizing your involvement: we engineered this feature to ensure your organization is unable to take over sub-organizations even if it wanted to.
Our Demo Passkey Wallet application serves an example of how email auth functionality might be integrated. We encourage you to try it (and check out the code) before diving into your own implementation.
Prerequisites
Make sure you have set up your primary Turnkey organization with at least one API user that can programmatically initiate email auth. Check out our Quickstart guide if you need help getting started. To allow an API user to initiate email auth, you'll need the following policy in your main organization:
{
  "effect": "EFFECT_ALLOW",
  "consensus": "approvers.any(user, user.id == '<YOUR_API_USER_ID>')",
  "condition": "activity.resource == 'AUTH' && activity.action == 'CREATE'"
}
Helper packages
- We have released open-source code to create target encryption keys, decrypt auth credentials, and sign Turnkey activities. We've deployed this as a static HTML page hosted on
auth.turnkey.commeant to be embedded as an iframe element (see the code here). This ensures the auth credentials are encrypted to keys that your organization doesn't have access to (because they live in the iframe, on a separate domain) - We have also built a package to help you insert this iframe and interact with it in the context of email auth:
@turnkey/iframe-stamper
In the rest of this guide we'll assume you are using these helpers.
Email Auth step-by-step
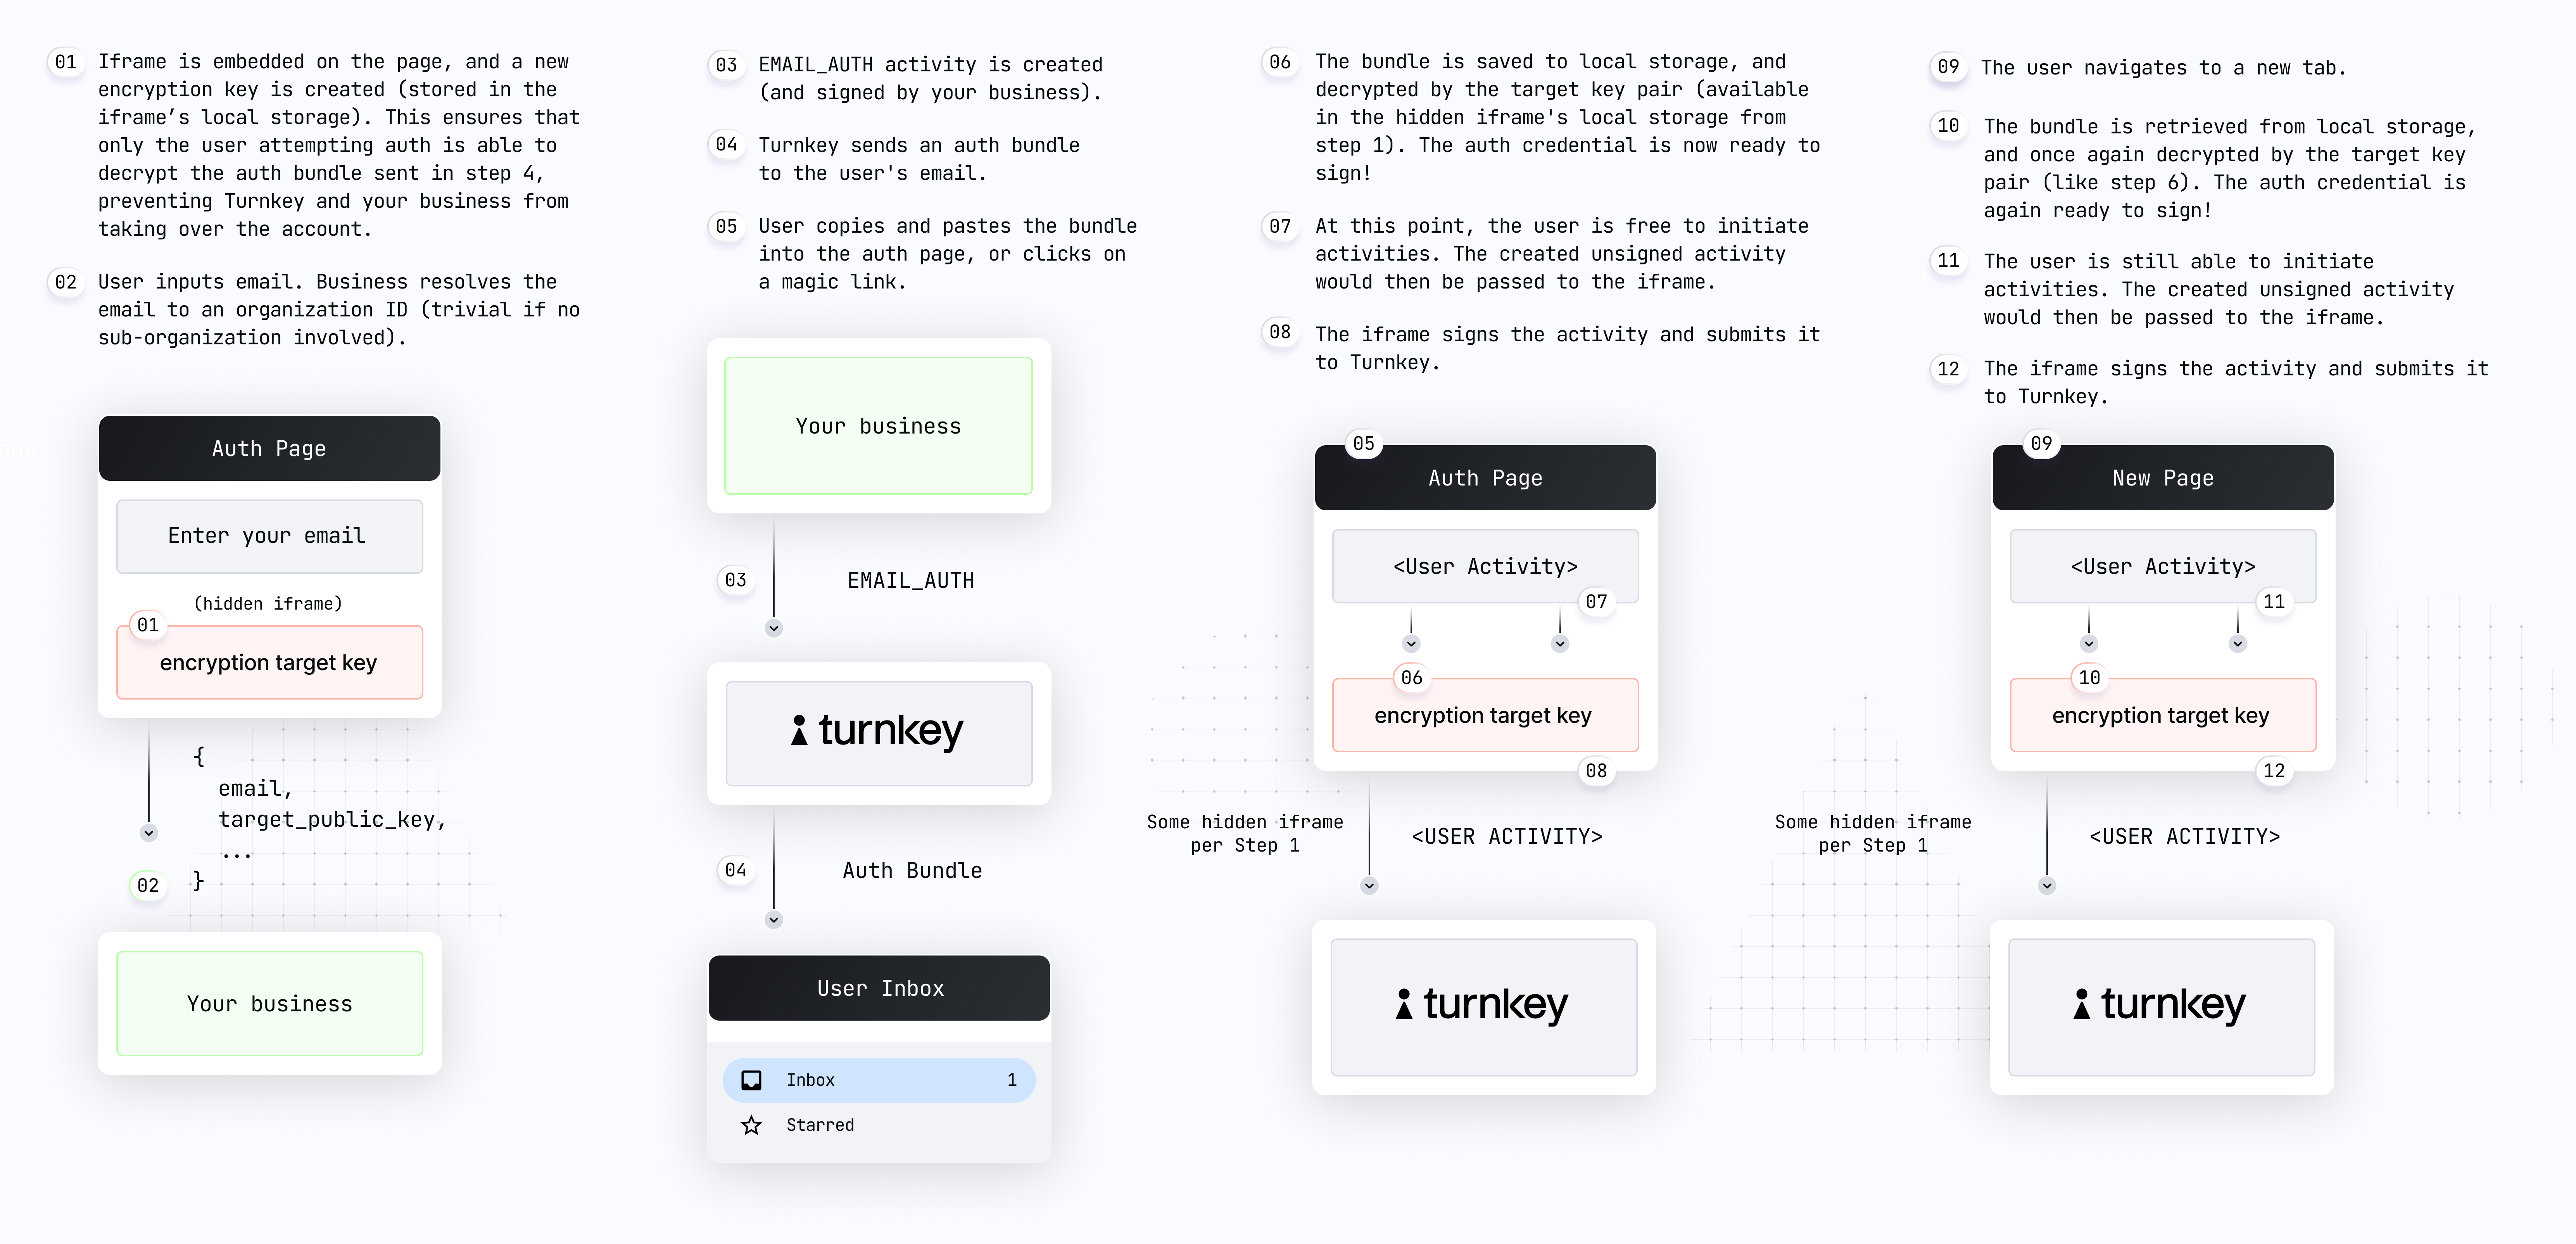
Here's a diagram summarizing the email auth flow step-by-step (direct link):

Let's review these steps in detail:
User on
yoursite.xyzclicks "auth", and a new auth UI is shown. We recommend this auth UI be a new hosted page of your site or application, which contains language explaining to the user what steps they will need to take next to successfully authenticate. While the UI is in a loading state your frontend uses@turnkey/iframe-stamperto insert a new iframe element:const iframeStamper = new IframeStamper({
iframeUrl: "https://auth.turnkey.com",
// Configure how the iframe element is inserted on the page
iframeContainerId: "your-container",
iframeElementId: "turnkey-iframe",
});
// Inserts the iframe in the DOM. This creates the new encryption target key
const publicKey = await iframeStamper.init();Your code receives the iframe public key and shows the auth form, and the user enters their email address.
Your app can now create and sign a new
EMAIL_AUTHactivity with the user email and the iframe public key in the parameters. Optional arguments include a custom name for the API key, and a specific duration (denoted in seconds) for it. Note: you'll need to retrieve the sub-organization ID based on the user email.Email is received by the user.
User copies and pastes their auth code into your app. Remember: this code is an encrypted credential which can only be decrypted within the iframe. In order to enable persistent sessions, save the auth code in local storage:
window.localStorage.setItem("BUNDLE", bundle);See Email Customization below to use a magic link instead of a one time code.
Your app injects the auth code into the iframe for decryption:
await iframeStamper.injectCredentialBundle(code);At this point, the user is authenticated!
Your app should use
@turnkey/iframe-stamperto sign a new activity, e.g.CREATE_WALLET:// New client instantiated with our iframe stamper
const client = new TurnkeyClient(
{ baseUrl: "https://api.turnkey.com" },
iframeStamper,
);
// Sign and submits the CREATE_WALLET activity
const response = await client.createWallet({
type: "ACTIVITY_TYPE_CREATE_WALLET",
timestampMs: String(Date.now()),
organizationId: authResponse.organizationId,
parameters: {
walletName: "Default Wallet",
accounts: [
{
curve: "CURVE_SECP256K1",
pathFormat: "PATH_FORMAT_BIP32",
path: "m/44'/60'/0'/0/0",
addressFormat: "ADDRESS_FORMAT_ETHEREUM",
},
],
},
});User navigates to a new tab.
Because the code was also saved in local storage (step 6), it can be injected into the iframe across different tabs, resulting in a persistent session. See our Demo Passkey Wallet for a sample implementation, specifically dealing with sharing the iframeStamper across components.
const code = window.localStorage.getItem("BUNDLE");
await iframeStamper.injectCredentialBundle(code);
Again, the user is authenticated, and able to initiate activities!
Just like step 8, the iframeStamper can be used to sign another activity.
const client = new TurnkeyClient(
  { baseUrl: "https://api.turnkey.com" },
  iframeStamper,
);

// Sign and submits a SIGN_TRANSACTION activity
const response = await client.signTransaction({
  type: "ACTIVITY_TYPE_SIGN_TRANSACTION_V2",
  timestampMs: String(Date.now()),
  organizationId: authResponse.organizationId,
  parameters: {
    signWith: "0x...",
    type: "TRANSACTION_TYPE_ETHEREUM",
    unsignedTransaction: "unsigned-tx",
  },
});
Congrats! You've succcessfully implemented Email Auth! 🥳
Integration notes
Email customization
We offer customization for the following:
appName: the name of the application. This will be used in the email's subject, e.g.Sign in to ${appName}logoUrl: a link to a PNG with a max width of 340px and max height of 124pxmagicLinkTemplate: a template for the URL to be used in the magic link button, e.g.https://dapp.xyz/%s. The auth bundle will be interpolated into the%s
// Sign and submits the EMAIL_AUTH activity
const response = await client.emailAuth({
  type: "ACTIVITY_TYPE_EMAIL_AUTH",
  timestampMs: String(Date.now()),
  organizationId: <sub-organization-id>,
  parameters: {
    email: <user-email>,
    targetPublicKey: <iframe-public-key>,
    apiKeyName: <optional-api-key-name>,
    expirationSeconds: <optional-api-key-expiration-in-seconds>,
    emailCustomization: {
      appName: <optional-your-app-name>,
      logoUrl: <optional-your-logo-png>,
      magicLinkTemplate: <optional-magic-link>
    }
  },
});
Bespoke email templates
We also support custom HTML email templates for Enterprise clients. This allows you to inject arbitrary data from a JSON string containing key-value pairs. In this case, the emailCustomization variable may look like:
...
emailCustomization: {
  templateId: <HTML-template-stored-in-turnkey>,
  templateVariables: "{\"username\": \"alice and bob\"}"
}
...
In this specific example, the value alice and bob can be interpolated into the email template using the key username. The use of such template variables is purely optional.
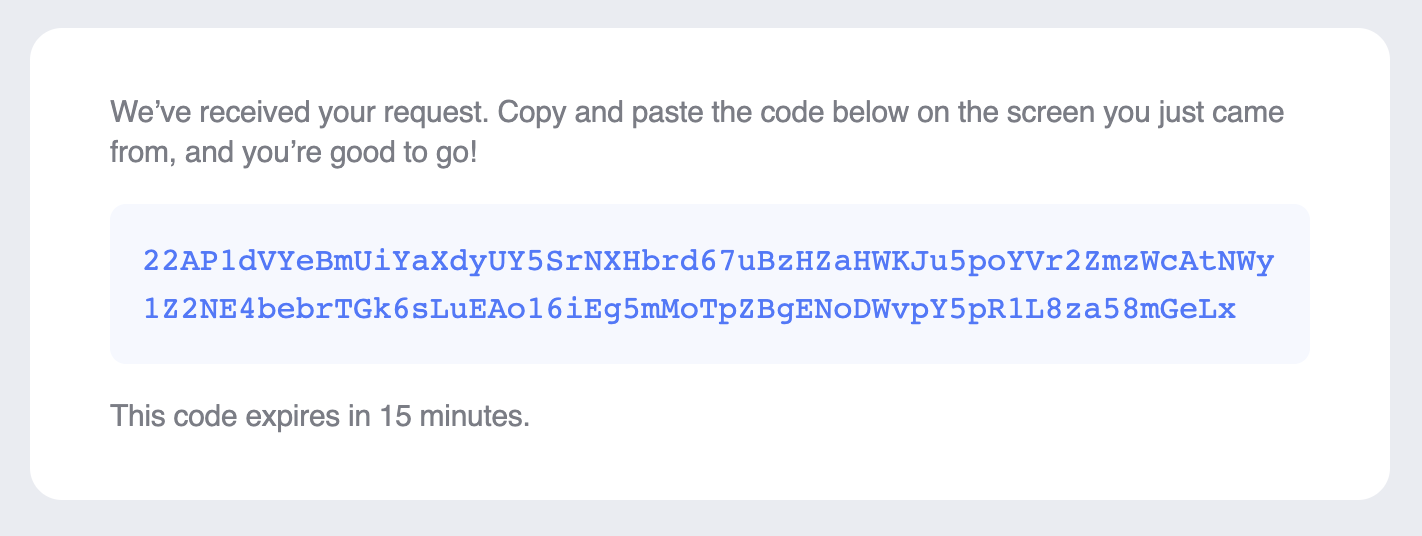
Here's an example of a custom HTML email containing an email auth bundle:

If you are interested in implementing bespoke, fully-customized email templates, please reach out to hello@turnkey.com.
Credential validity checks
By default, if a Turnkey request is signed with an expired credential, the API will return a 401 error. If you'd like to validate an injected credential, you can specifically use the whoami endpoint:
const whoamiResponse = await client.getWhoami({
  organizationId,
});
A valid response indicates the credential is still live; otherwise, an error including unable to authenticate: api key expired will be thrown.